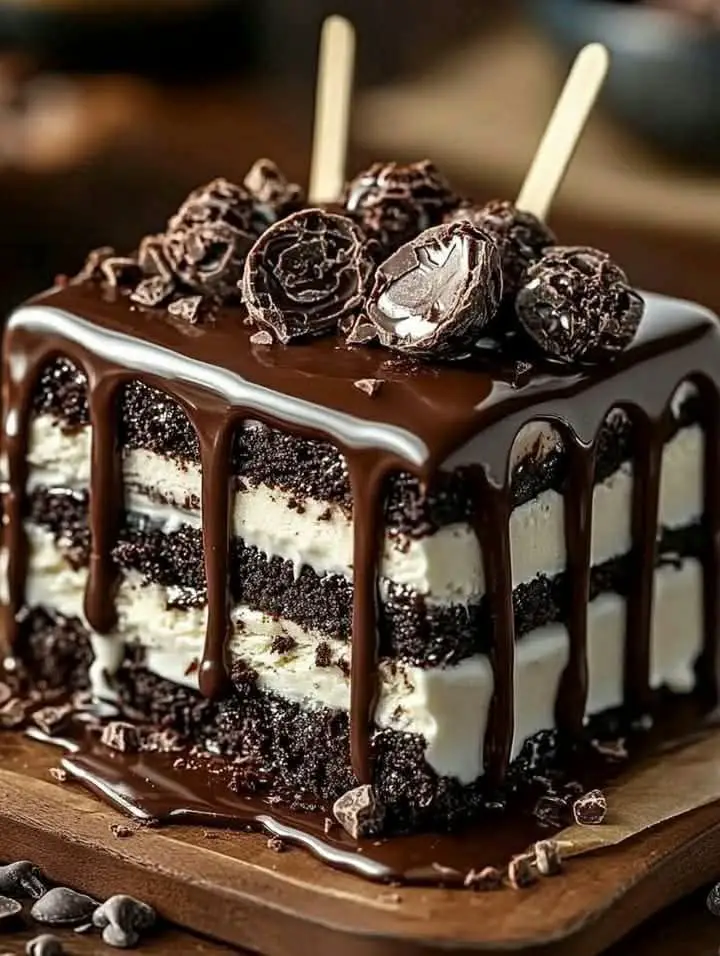
The Ultimate Guide to Making Delicious Chocolate-Covered Ice Cream Bars
Who doesn’t love a cool and creamy ice cream bar on a hot summer day? But what makes it even better? A rich and velvety chocolate coating, of course! In this article, we’ll take you through the process of making the perfect chocolate-covered ice cream bars at home. With our easy-to-follow recipe and step-by-step guide, you’ll be enjoying these decadent treats in no time.
A Little History Behind Chocolate-Covered Ice Cream Bars
Chocolate-covered ice cream bars have been a beloved summer treat for decades. The origins of this delicious dessert date back to the early 20th century when ice cream vendors began dipping ice cream sticks into melted chocolate to attract more customers. This simple yet genius idea quickly gained popularity, and soon chocolate-covered ice cream bars were a staple at ice cream shops and fairs across the country.
Why Make Chocolate-Covered Ice Cream Bars at Home?
While store-bought chocolate-covered ice cream bars are convenient, making them at home offers several benefits. For one, you can customize the flavors to your liking by choosing your favorite type of ice cream, chocolate, and toppings. Secondly, homemade ice cream bars are often healthier since you can control the ingredients and amount of added sugars. Lastly, making chocolate-covered ice cream bars at home is a fun and rewarding process that’s perfect for hot summer days when you’re looking for a cool and creative activity.
The Ingredients You’ll Need
To make the perfect chocolate-covered ice cream bars, you’ll need the following ingredients:
- 2 cups of vanilla ice cream (slightly softened)
- 1/2 cup of crushed cookies, nuts, or sprinkles (optional)
- 2 cups of semisweet chocolate chips
- 2 tablespoons of coconut oil
- Crushed nuts, sprinkles, or shredded coconut (optional toppings)
Tips for Choosing the Best Ingredients
When it comes to choosing the best ingredients for your chocolate-covered ice cream bars, there are a few things to keep in mind. First, choose a high-quality vanilla ice cream that’s rich and creamy. If you want to add some texture to your ice cream bars, consider using crushed cookies, nuts, or sprinkles. For the chocolate coating, semisweet chocolate chips are the best choice since they provide a rich and balanced flavor. Coconut oil is added to the chocolate coating to give it a smooth and glossy finish.
Step-by-Step Guide to Making Chocolate-Covered Ice Cream Bars
Now that you have all the ingredients, let’s move on to the fun part – making the chocolate-covered ice cream bars! Here’s a step-by-step guide to help you along the way:
Step 1: Prepare the Ice Cream Bars
To start, line an 8×8-inch pan with parchment paper. Spread the softened vanilla ice cream evenly into the pan, making sure to fill it to the top. If desired, mix in crushed cookies, nuts, or sprinkles for added texture. Once the ice cream is evenly distributed, place the pan in the freezer for at least 2 hours or until the ice cream is completely firm.
Step 2: Cut and Skewer the Ice Cream Bars
After the ice cream is firm, remove it from the pan and cut it into bars or squares. To make it easier to handle the ice cream bars, insert a wooden popsicle stick into each bar. Return the ice cream bars to the freezer while you prepare the chocolate coating.
Step 3: Make the Chocolate Coating
In a microwave-safe bowl, melt the chocolate chips and coconut oil in 20-second intervals, stirring until smooth and glossy. Be careful not to overheat the chocolate, as this can cause it to seize up and lose its smooth texture. Let the chocolate cool slightly to avoid melting the ice cream.
Step 4: Coat the Ice Cream Bars
Once the chocolate coating is ready, it’s time to coat the ice cream bars. Dip each bar into the melted chocolate, making sure it’s fully coated. Quickly sprinkle with crushed nuts, sprinkles, or shredded coconut before the chocolate hardens. Place the coated bars on a parchment-lined tray and freeze for another hour or until the chocolate is set.
Step 5: Serve and Enjoy!
Once the chocolate-covered ice cream bars are set, it’s time to serve and enjoy! Store any leftover bars in an airtight container in the freezer for up to 2 weeks. When you’re ready to serve, simply remove the bars from the freezer and let them sit at room temperature for a few minutes to soften slightly.
Tips and Variations for Making the Best Chocolate-Covered Ice Cream Bars
Now that you have the basic recipe down, here are a few tips and variations to help you take your chocolate-covered ice cream bars to the next level:
- Use different types of ice cream, such as strawberry or mint, to create unique flavor combinations.
- Experiment with different types of chocolate, such as white chocolate or dark chocolate, for a different twist on the classic recipe.
- Add a pinch of salt to the chocolate coating to balance out the sweetness and enhance the flavors.
- Use chopped nuts or candy pieces to create a fun and playful texture.
Conclusion
Making chocolate-covered ice cream bars at home is a fun and rewarding process that’s perfect for hot summer days when you’re looking for a cool and creative activity. With our easy-to-follow recipe and step-by-step guide, you’ll be enjoying these decadent treats in no time. So go ahead, get creative, and make some delicious chocolate-covered ice cream bars today!
Prep Time: 20 minutes | Freezing Time: 3 hours | Total Time: 3 hours 20 minutes | Kcal: 300 kcal | Servings: 6 bars

